

Changelog:
v1.01 (Jan 30, 2020) — iOS 13.3.1 fixes a bug that affected the way Share Sheet imports had to take you out of the Photos app and into Shortcuts. So this is now simplified. Also added emoji graphics to make the main menu fancier.
v1.02 (Sep 5, 2020) — Updated to fix the shortcut stalling at deletion of original photos after processing. Apple changed some behavior in the Shortcuts.app.
Summary
HEIFer is a shortcut for iPhones and iPads (you can import and run it in the Shortcuts app that is part of iOS 13) that automates the batch conversion of photo to HEIF/HEIC formats. This has the benefit of making their files dramatically smaller without any visible loss of image quality.
HEIF stands for High Efficiency Image Format, and Apple introduced support for it in 2017. You can find out more about the format here.
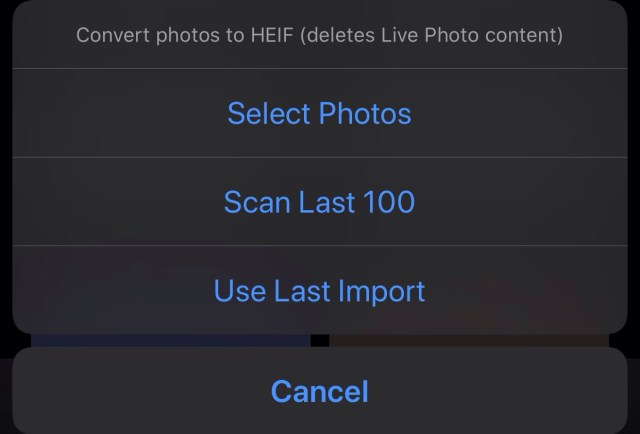
HEIFer has three modes:
- Converting a manual selection of photos
- Scanning the newest 100 photos in your library, and converting any JPEG/PNG/TIFF images it finds
- Converting the last imported batch of photos (from a camera or SD card, using an adapter)
Add HEIFer to your Shortcuts.app here (v1.02)
Why Did I Make This?
This is my first proper iOS Shortcut and I made it to learn the ropes.
I’m kinda all-in on the HEIF format, and if your iPhone is set to save at “High Efficiency” in the Camera section of Settings.app, then you’re already using it for every photo you take. The quality is great, and you can store twice as many photos in the same amount of storage space.
But… I also shoot photos with other cameras, and every manufacturer, from Canon and Nikon to Sony and Leica, seems to be years behind in the software game, and the only options they offer are usually JPEG and RAW. What’s more, the CPUs in these cameras are usually very underpowered compared to what’s in your iPhone, so they don’t try very hard to compress the images efficiently. You can typically turn a 10MB JPEG from your camera into a 3–4MB HEIF file in less than a second. It’s a tremendous waste of space, both on device and in your cloud backups, to keep the JPEGs.
I also edit my photos with iOS apps like VSCO and Lightroom, and almost all of them save the finished photos in JPEG. So if you’re regularly editing your iPhone photos, those small .heic files are still ending up as fat .jpg files at the end of the day. It’s nuts!
So HEIFer is a way to quickly take those old-ass files, bring them into the present, and then dump the originals. For instance, if I’m shooting directly to JPEG on my cameras (why not RAW? That’s a topic for another day), all I have to do is plug in the SD card, select “Import All”, run HEIFer, and I’m done in three taps.
If your photos have proper timestamps, then you will still see them in chronological order in the “Photos” tab. However, if you go into the “Recents” photo album, it will reflect the process of converting and deleting them, i.e. it’ll be as out of order as your recollection of a big night out.
Usage
Option 1: Select Photos
- This will pull up a standard iOS photo picker. Tap all the photos you want to convert, and tap Done.
Option 2: Scan Last 100
- I picked the 100 number out of a hat. The idea was that you could use this for periodic spring cleaning, to make sure none of your recent photos were lingering around in JPEG format. I didn’t want to scan ALL photos, just enough to cover the last couple of weeks. You can change the number from 100 to anything you’d like by editing the shortcut’s details.
- When you select this option, HEIFer will display all the photos/screenshots that are eligible for conversion, out of your last 100. Photos that are already HEIF (with a .heic extension) will not be shown.
Option 3: Use Last Import
- This will grab all the photos from the last batch you imported to your iPhone/iPad using an SD card or camera adapter. If you attempt to do this, but you don’t have a “Last Import”, then HEIFer will stall here. Just tap the “Stop” icon to quit.
- You will be shown a quick preview of all the eligible images found, just so you know what will be converted if you proceed.
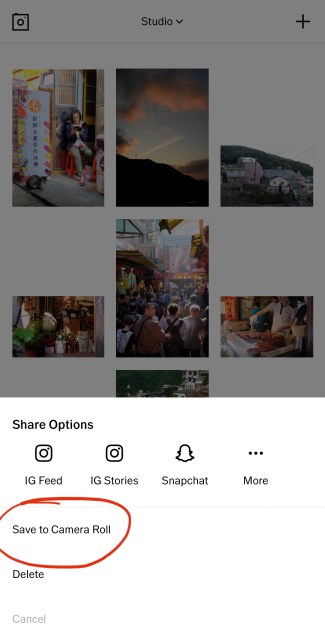
Import From Share Sheet
You may also send files for conversion from within the Photos.app, using the system share sheet. Simply select one or multiple images and tap the “Share” icon, and look for HEIFer under the Actions list. If you don’t see it listed, you may have to go into the Details view within the Shortcuts.app by tapping the three dots icon on HEIFer’s panel, and then the other three dots icon at the top of the page, and then enabling the “Show in Share Sheet” toggle switch.
Saving the Converted Files
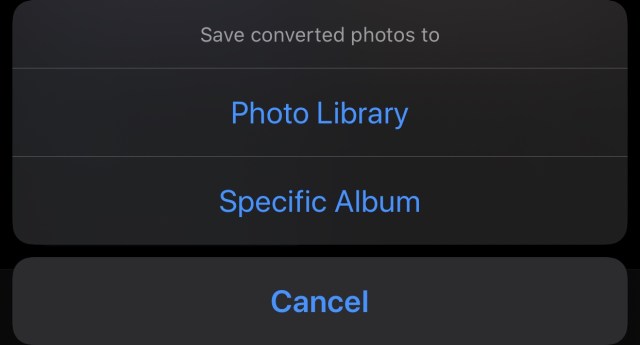
- After you’ve specified what needs converting, HEIFer will ask you where you want to save the new photos. Tap “Photo Library” to simply save them. Tap “Specific Album” if you want to organize them into an existing album. Note that if you tap “Cancel” at this stage, nothing will be saved or deleted.
- If any of the specified photos are not JPEGs, PNGs, or TIFFs, they will not be converted. This is useful because you can accidentally select files that are already HEIF format, and they will be ignored.
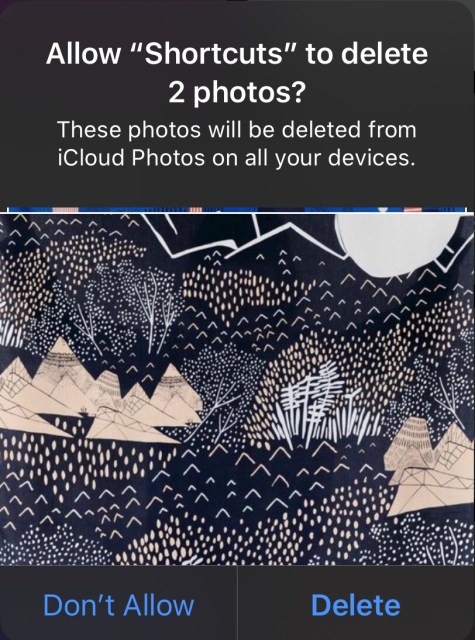
- You will then get a confirmation pop up that the converted files are going to be deleted. You can hit “Cancel” if you want to keep them for some reason. ONLY FILES THAT WERE CONVERTED will be deleted. Any file that didn’t qualify (e.g. existing HEIF files) will be left alone.
- You’ll then see a confirmation dialog box with the number of photos that were successfully converted.
====
Do note that 1) the original files are deleted after conversion, but you can hit “Cancel” if you want to keep them, and 2) any Live Photo data will be lost. HEIFer’s main use cases are camera imports and app exports, which generally aren’t Live Photos anyway. The Shortcuts app is instructed to keep all other metadata.
If you’d like to convert photos to HEIF and keep your Live Photo videos, Darkroom will do it. I just find it much quicker to select and convert a batch of photos this way, and as mentioned, photos from my external cameras don’t do Live Photos anyway.
Disclaimer
I shouldn’t have to point out that this is provided with no guarantees, and that I can’t be responsible for any data loss you encounter while using HEIFer. I made this for my own use, and have not encountered any issues. You may look through the actions that make up the shortcut at any time, and Apple encourages you to do so before saving any third-party shortcut to your own collection.
If you do somehow end up deleting files you didn’t mean to, don’t forget that you can recover the last 30 days of deleted photos by going into the “Recently Deleted” section at the bottom of the “Albums” tab in Photos.app.
I also can’t be responsible for any funny looks you get in public when asking Siri to run HEIFer.

Leave a comment